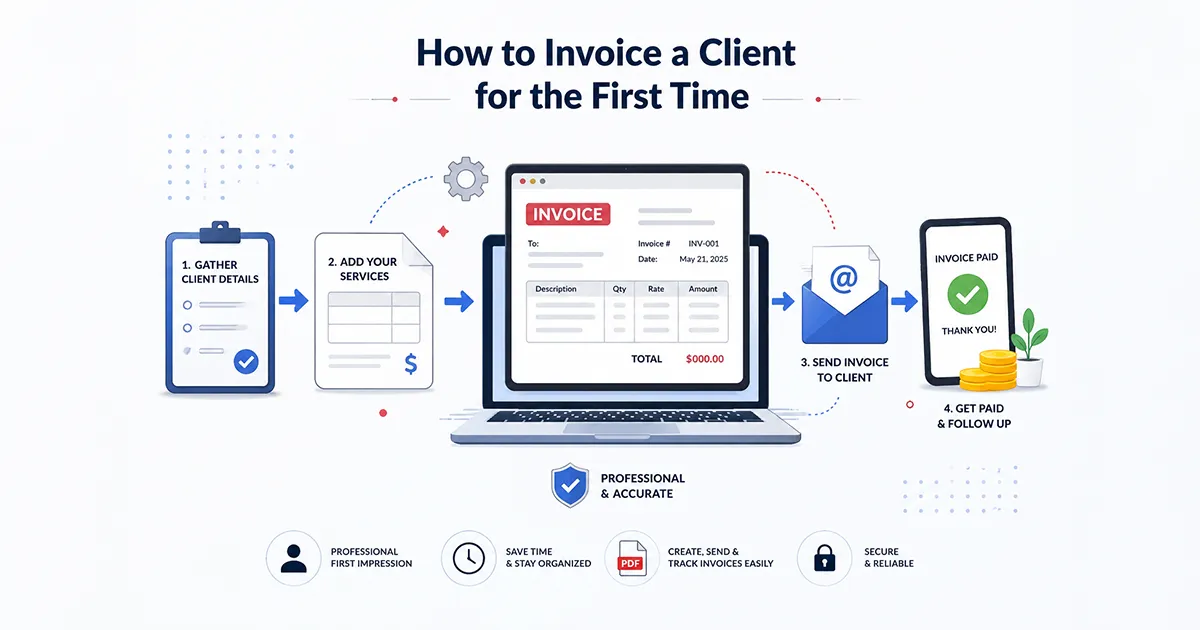
You finished the work. The client is happy. Now comes the part nobody warned you about: sending an invoice.
For most first-time freelancers, this is where the momentum stalls. Do you need a registered business to invoice someone? What fields are legally required? Do you send it as a PDF or a link? What do you do if they don't pay?
This guide answers all of that. By the end, you'll know exactly what to put on your invoice, when to send it, how to set payment terms that protect you, and how to follow up without making things awkward.
What Is a Freelance Invoice (and Why It Matters More Than You Think)
An invoice is a formal payment request. It tells your client what work you did, how much they owe you, and when payment is due.
That sounds simple. But a bad invoice — missing fields, vague descriptions, no due date — is one of the main reasons freelancers get paid late or not at all. According to the Freelancers Union, over 70% of freelancers have experienced trouble collecting payment at least once, and poor invoicing practices are a leading contributor.
A good invoice does three things beyond just asking for money:
- It protects you legally. An invoice is documentation of the agreed transaction. If a client disputes the work or the amount, your invoice trail is evidence.
- It keeps your taxes clean. Every invoice is a revenue record. Sequential, well-organized invoices make tax filing far less painful — and tax authorities in most countries require them.
- It signals professionalism. Nothing looks more unprofessional than a hastily put-together invoice full of mistakes. Clients are more likely to work with you again if you present a polished, professional appearance in all your documentation.
Do You Need a Registered Business to Invoice a Client?
No. You can invoice as an individual using your full legal name in place of a business name.
If you're a sole trader or sole proprietor, your name is your business. You don't need an LLC or a registered company to send a legally valid invoice. US sole proprietors can invoice using their SSN — but using an EIN (free from irs.gov) is safer and more professional.
If you eventually do register a business, update your invoice template to reflect the registered name. Until then, your full name works fine.
What to Include on Your First Invoice
This is where most first-timers go wrong — either by leaving out fields that clients need to process payment, or by being so vague that their line items invite disputes.
A professional invoice contains exactly what your client needs to process payment without asking questions. Here's what every invoice should have:
1. Your Contact Information
Your name (or business name), email address, and optionally your phone number and mailing address. If you're VAT or GST registered, include your registration number here. Keep this at the top — it's the first thing a client, or their accounts payable team, looks for.
2. Client Contact Information
The client's full name or company name, their billing address, and the name of the specific person who handles payments. If you're invoicing a company with an accounts payable department, get their AP email address before you send anything. Sending to the wrong inbox is one of the most common reasons invoices sit unpaid for weeks.
3. Invoice Number
Every invoice needs a unique, sequential number. Tax authorities (IRS, HMRC, EU VAT) require unique sequential invoice IDs, and gaps in numbering can trigger questions.
For your first invoice, you can start wherever you like — INV-001, 2026-001, or 1001 all work. What matters is that you stick to the same system and never reuse a number. A year-prefix format like 2026-001 is worth considering from day one — it makes filing by year automatic and looks more established than starting at 1.
4. Invoice Date and Due Date
Include both. The invoice date is when you issued it. The due date is the specific calendar date by which you expect payment — not a vague "30 days" but an actual date like "Due 15 July 2026." Specific due dates get paid faster. Vague ones get filed and forgotten.
5. Detailed Line Items
This is the most important section, and the most commonly botched. "Web design — $2,500" is bad. "Brand identity package: logo (3 variants), color palette, typography system, brand guidelines doc — $2,500" is good. Itemizing makes the invoice harder to dispute and easier for the client to expense.
For each line item, include:
- A clear description of the service or deliverable
- Quantity (hours, units, or sessions)
- Rate (per hour, per unit, or flat)
- Subtotal per line
If you're billing hourly, show the hours and rate separately so the math is transparent. If you're billing a flat project fee, break it down by deliverable anyway — it removes any question about what they're paying for.
6. Expenses (If Applicable)
If you incurred costs on the client's behalf — travel, software licenses, stock images, subcontractors — list them as separate line items with a brief description. Even if you agreed with your client beforehand about extra expenses, make sure to list them on the invoice so clients are aware of them when they pay.
7. Tax
If you're required to charge tax (VAT, GST, sales tax), show the rate and the calculated amount as a separate line. Never bury it in the total. Clients need the tax breakdown for their own records, and in some jurisdictions it's legally required on the invoice face. If you're not tax-registered, simply leave this section out.
8. Total Amount Due
Make this large and obvious. It should be impossible to miss. State the currency clearly — especially if you're working with international clients.
9. Payment Instructions
Include bank transfer details (account name, IBAN/routing, SWIFT for international), a payment link if you have Stripe or PayPal connected, and a clear due date. Vague "send to my Venmo" notes are why first invoices stall. The fewer steps between your client and payment, the faster you get paid.
10. Payment Terms (Optional but Recommended)
A brief note of your terms — late fees, revision policy, deposit requirements — can go in a notes section at the bottom. It's also fine to include a short thank-you note here. Something human, not corporate. Clients are people.
Setting Payment Terms That Actually Protect You
Payment terms tell your client when payment is due and what happens if they miss it. Getting this right matters more than most new freelancers realize.
Common freelance payment terms include:
- Due on Receipt — best for small projects or new clients
- Net 7 — client has 7 days to pay; good for ongoing relationships
- Net 14 — the most popular term among freelancers
- Net 30 — standard for B2B work, especially with larger companies
- 50/50 Milestone — 50% upfront, 50% on delivery; ideal for projects over $2,000
For a first-time client, Net 14 is a reasonable default. It's short enough to protect your cash flow but not so tight that it creates friction before you've built a relationship.
If the project is large — anything over $1,000 — consider asking for a deposit upfront. Most professional clients won't bat an eye at this, and it tells you something useful if they push back hard.
A note on late fees: You can include a late fee clause (typically 1.5–2% per month on the outstanding balance) in your payment terms. Whether you enforce it is up to you. Simply having it on the invoice tends to change behavior.
How to Create Your Invoice
You have a few options, each with different tradeoffs:
- Word or Google Docs template. Free and flexible, but you calculate totals manually, export to PDF yourself, and track payments in a separate spreadsheet.
- Excel or Google Sheets. Better for auto-calculating totals, but still manual on the formatting and tracking side.
- Free online invoice generator. The fastest option for most freelancers. Fill in your details, add line items, and download a professional PDF in under five minutes — no account required, no watermark, no subscription.
- Invoicing software (FreshBooks, Zoho, Wave, etc.). Worth considering once you're sending more than 5–10 invoices a month. Overkill for your first invoice.
For a first invoice, an online generator is the practical choice. It produces a clean PDF instantly and handles the formatting for you.
When to Send Your Invoice
Send it the day you deliver the work. Not a few days later. Not at the end of the month.
Invoice timing directly affects how quickly you get paid. The client's enthusiasm is highest right when they receive the deliverable — that's the moment they're most primed to act. Every day you wait, the project fades in their mind and payment drops in priority.
For milestone-based projects, invoice at each milestone — not at the end. This also limits your exposure if the relationship goes sideways mid-project.
How to Send Your Invoice
Email is standard. Attach the invoice as a PDF and include a short, professional note in the email body. Keep it brief — something like:
Hi [Name],
Please find attached invoice #2026-001 for [project name], totalling [amount], due [date].
Payment details are included on the invoice. Please let me know if you have any questions.
Thanks again for the project — it was good to work on.
[Your name]
No lengthy explanation, no apology for invoicing, no excessive pleasantries. Short emails get read. Long ones get deferred.
Save a copy of every invoice as a PDF with a clear filename — for example, Invoice-2026-001-ClientName.pdf — so it's easy to track down later.
Special Cases: Invoicing Different Client Types
Invoicing a Corporate Client for the First Time
Get their accounts payable department's email upfront. Include a Purchase Order number if they provide one. Accept Net 30 terms — corporate procurement doesn't move faster. Include a W-9 with the first invoice if you're US-based. Ask about their vendor setup process early, not after you've already sent the invoice.
Invoicing an International Client
Agree on the billing currency before work starts — USD or the client's local currency, not "we'll figure it out." Mention the wire transfer fee and currency conversion question upfront so neither side absorbs an unexpected $30–$60 charge.
Invoicing for a Recurring Retainer
Even your first retainer invoice should be sent before work starts each month, not after. Net 0 (paid upfront) for retainers is the standard. This becomes the easiest cash flow management you'll have.
What to Do When a Client Doesn't Pay
Late payments happen to almost every freelancer. The key is following up systematically and without emotion:
- Day 1 after due date: A short, friendly email. Assume it was an oversight. "Hi [Name], just a quick note — invoice #2026-001 was due today. Please let me know if you need anything from me to process it."
- Day 7: A firmer follow-up. Reference the invoice number and amount. Ask for an estimated payment date.
- Day 14+: A phone call. Short, professional, direct: "I'm calling about invoice #2026-001. It's now two weeks past due. When can I expect payment?"
Most late invoices are administrative oversights, not deliberate non-payment. A phone call resolves most of them. If you've followed up three times across three weeks with no result, you have options: a formal demand letter, a collections service, or — for smaller amounts — writing it off and requiring upfront payment next time.
Quick Checklist Before You Hit Send
- ✅ Your name and contact details are correct
- ✅ Client name and billing contact are correct
- ✅ Invoice number is unique and sequential
- ✅ Invoice date and specific due date are included
- ✅ Line items are clearly described (not just "services rendered")
- ✅ Hours/quantities and rates are shown separately
- ✅ Any expenses are listed as separate line items
- ✅ Tax is shown if applicable
- ✅ Total is clearly visible and in the correct currency
- ✅ Payment instructions are complete (bank details or payment link)
- ✅ You've saved a copy with a clear filename
Related PDF Tools You May Need
Once your invoice is ready, these tools can help you finalize and share it professionally:
- Compress PDF Tool — reduce file size before emailing
- Merge PDF Tool — combine your invoice with a contract or supporting documents
- Protect PDF Tool — password-protect sensitive invoices
- PDF to Word Tool — convert invoice templates for editing
Frequently Asked Questions
❓ Do I need to register a business to send an invoice?
No. You can invoice under your own name as a sole trader or sole proprietor. A registered business name or company is optional.
🔢 What invoice number should I start with?
Any number you choose — 001, 1001, or a year-prefix like 2026-001 all work. What matters is that every invoice has a unique number and you never reuse one.
💰 Should I charge tax on my invoice?
Only if you're registered to collect tax (VAT, GST, sales tax) in your jurisdiction. If you're not registered — common for new freelancers below the registration threshold — you don't charge tax and don't need to show it on the invoice.
📅 What payment terms should I use for my first client?
Net 14 is a sensible default for most freelancers. For larger projects, consider asking for 50% upfront. For corporate clients, Net 30 is usually expected.
📄 What file format should I send my invoice in?
PDF. It's universally readable, can't be accidentally edited, and looks professional. Most invoicing tools and templates export directly to PDF.
⚠️ What if the client pays less than the invoice total?
Follow up immediately. Ask whether the difference is an error or whether they're disputing a line item. Get the answer in writing before you do any more work for that client.
Conclusion
Sending your first invoice doesn't have to be complicated. Get the required fields right, set a specific due date, send it the day you deliver the work, and follow up if needed. That's genuinely most of it.
The fastest way to get started is with a free online invoice generator — fill in your details, add your line items, and download a clean PDF in minutes. No account, no watermark, no subscription.